Screenprint at home – outcome 1
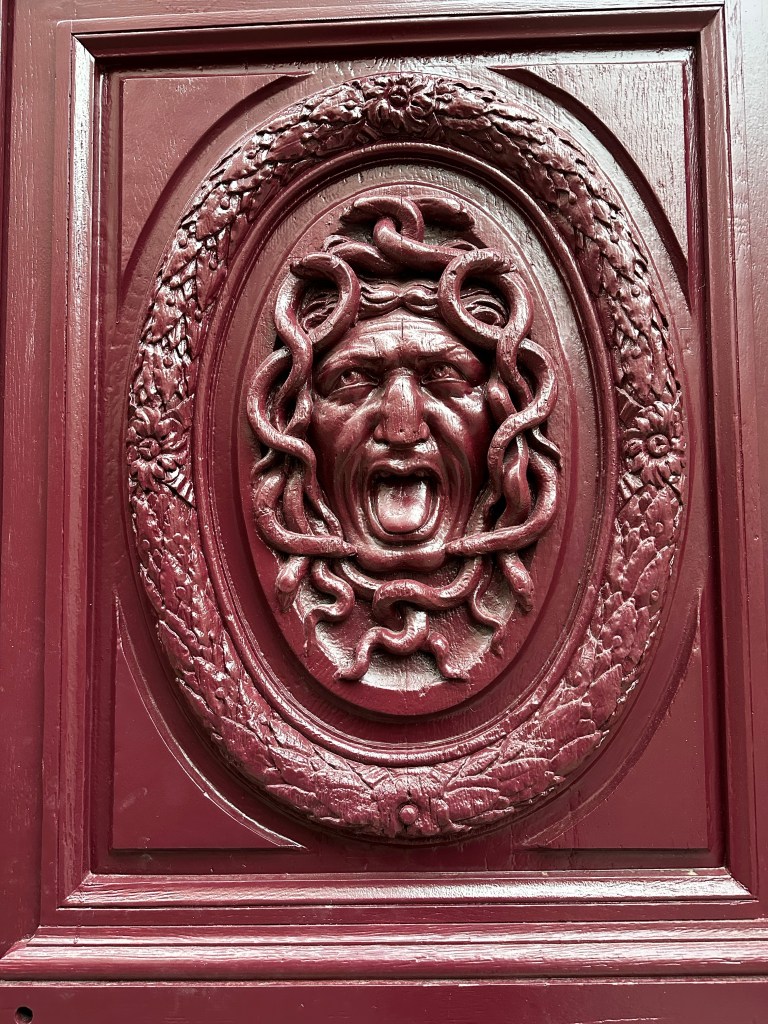
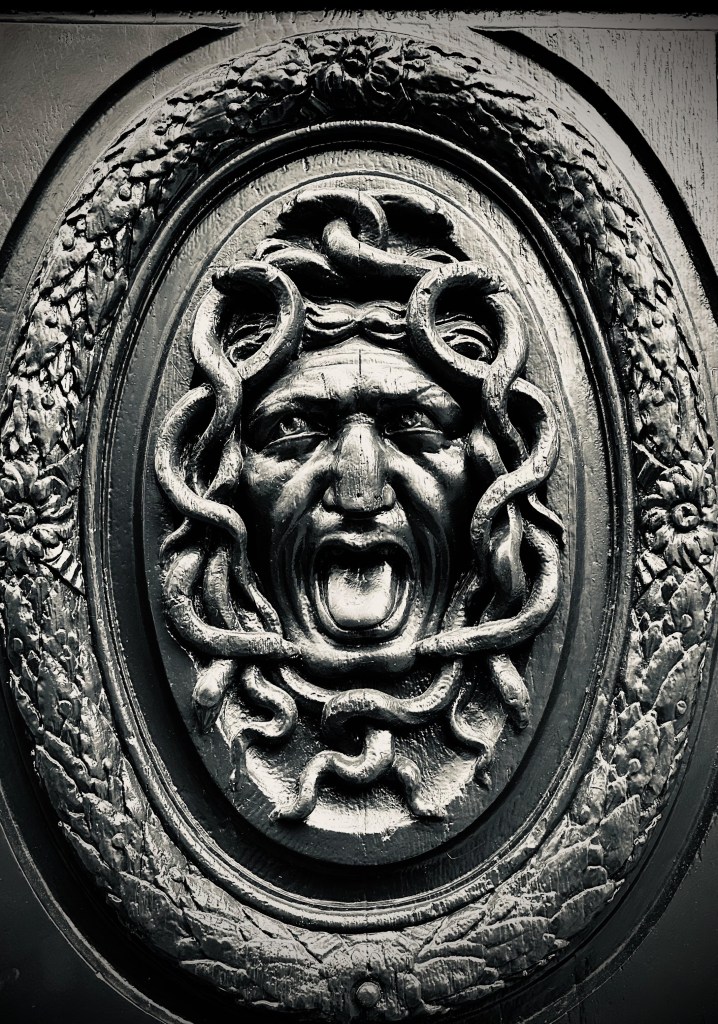
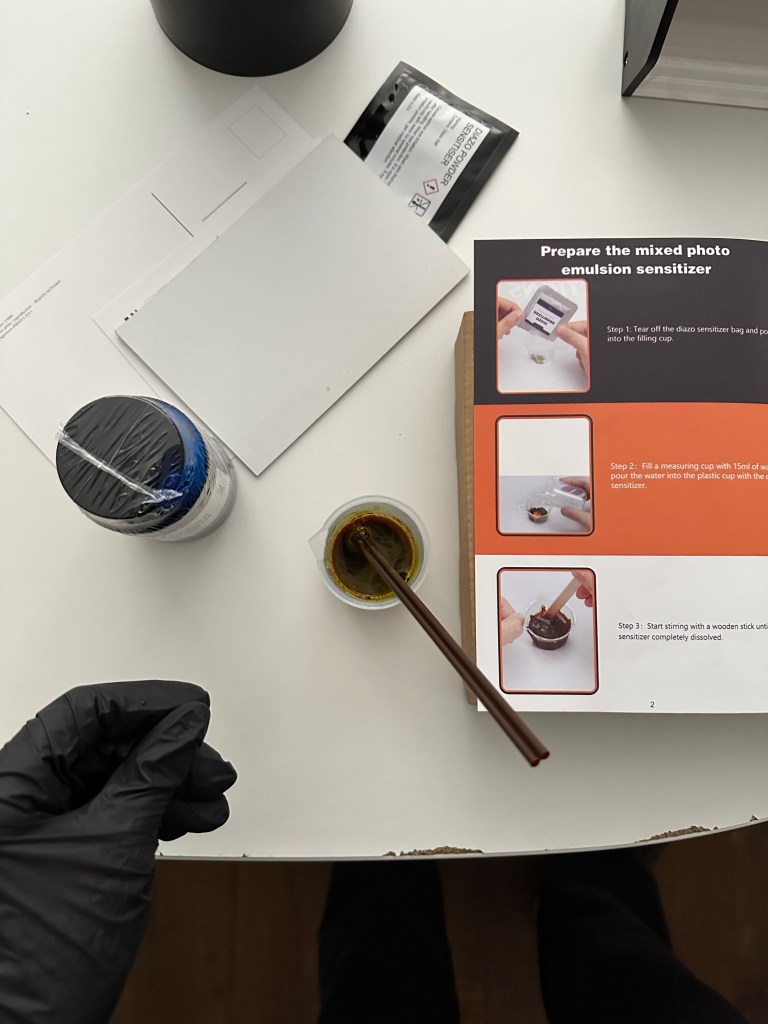
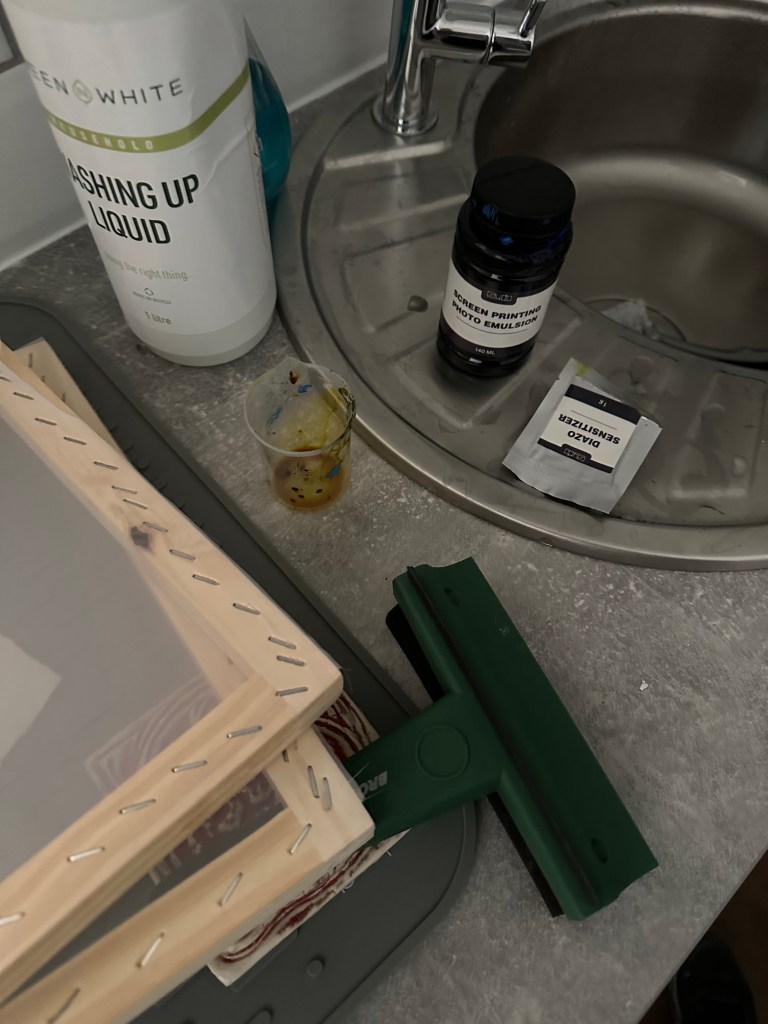
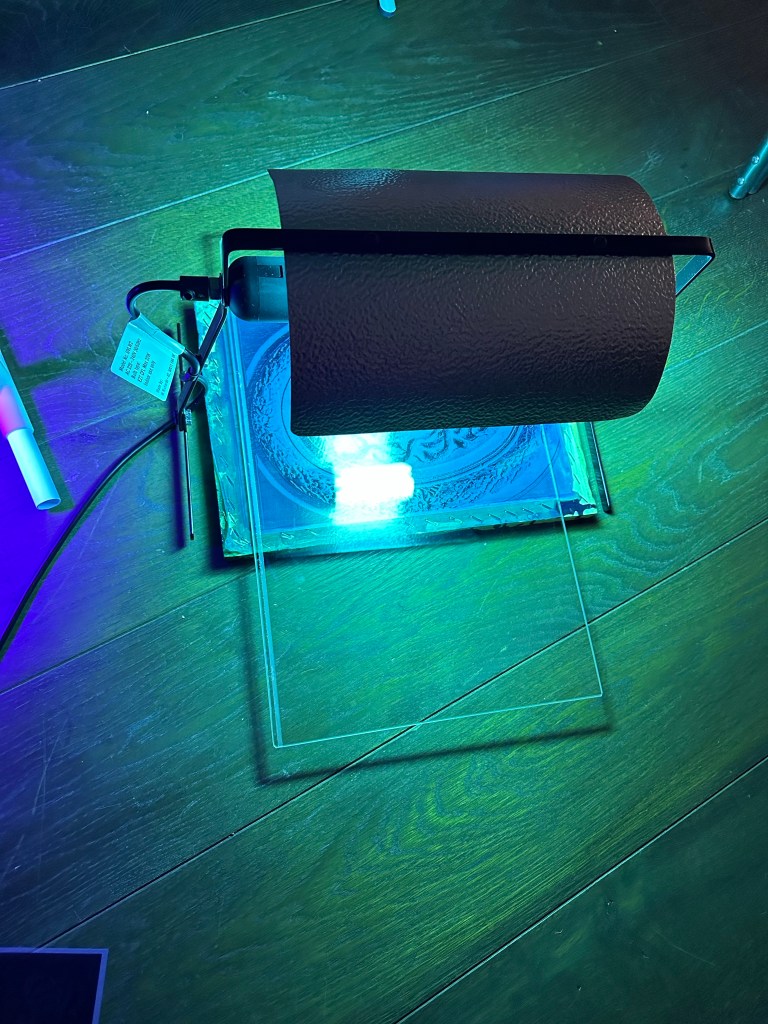
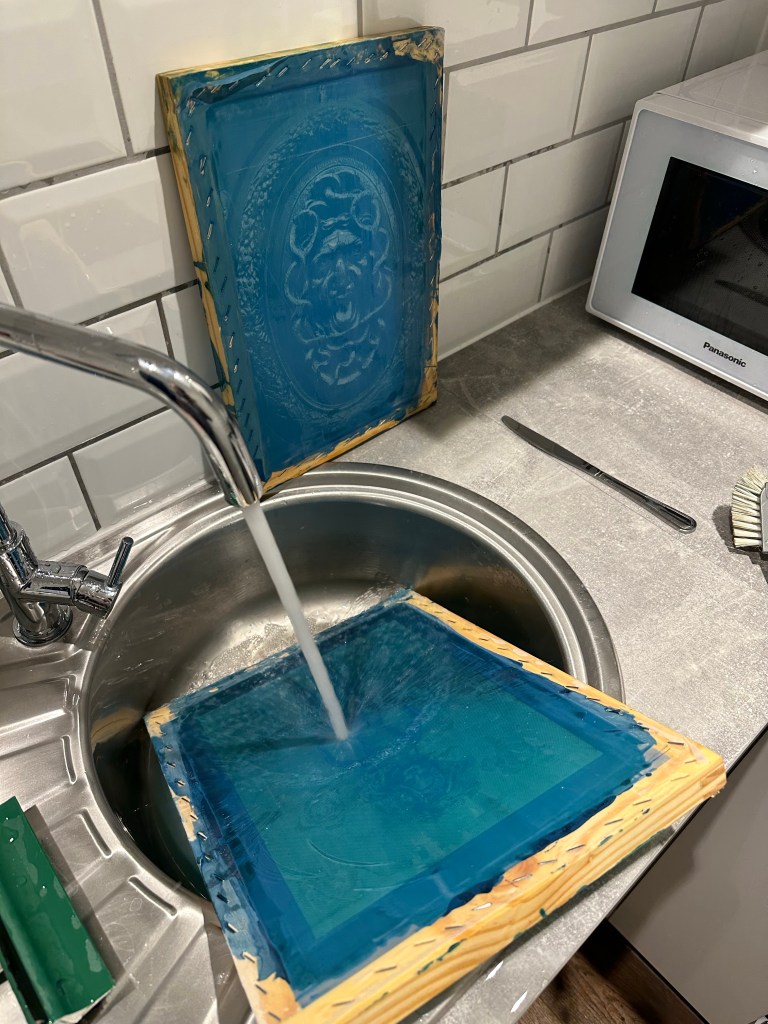
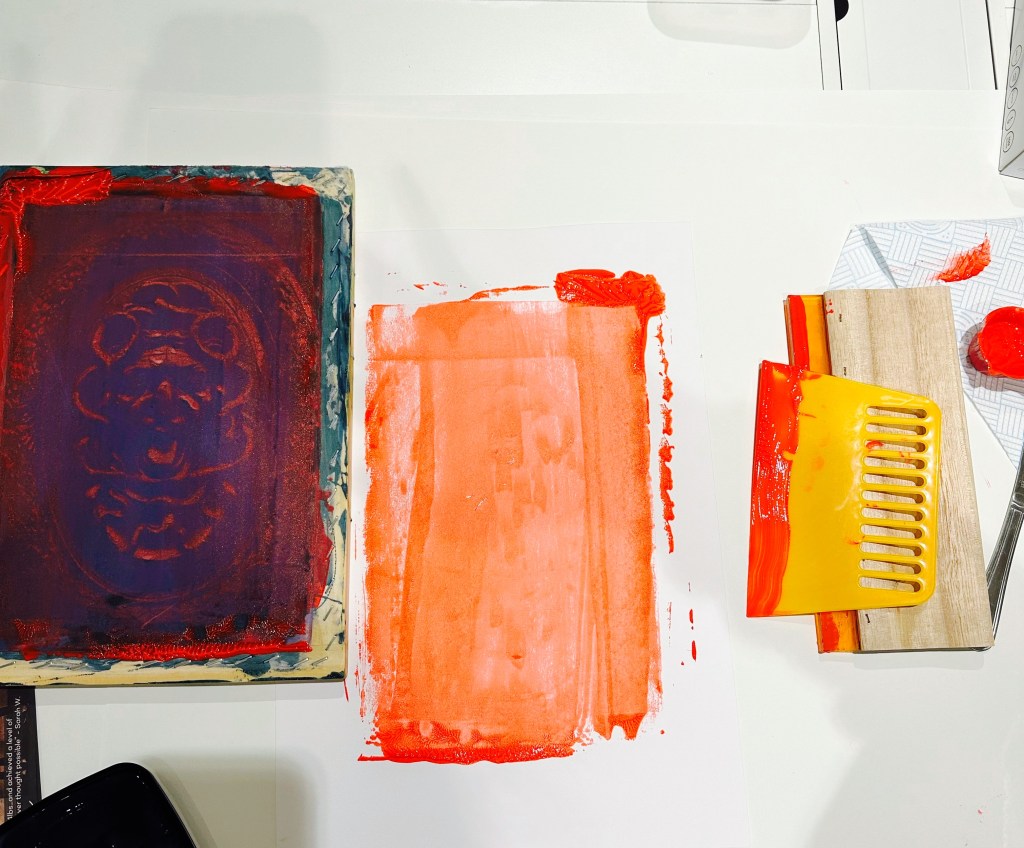
I attempted to use the celery rose print on the silkscreen as a background to photograph Barbie. I also made a halftone acetate print of a Medusa head that I photographed on a door. My intention was to create an inverted halftone image to expose on a photo emulsioned silkscreen and then my final piece would be a series of silk screen of that image. I bought a home silkscreen kit which was basic but appeared to have everything I need. Although it was time consuming, I managed to create the halftone image, print is onto acetate, mix the photo emulsion, coat the screen, dry it and then expose my image on to the screen.
In the washing process I noticed a little bit of the emulsion coming off but it was nothing that spoiled the image. I then mixed my acrylic paint with the medium and then prepped the screen and attempted to pull the squeegee down over the silk to screen print my image. Unfortunately it did not work as I realised only after many attempts that the density of the mesh was far too fine – made for delicate fabric printing and therefore my image would not imprint on the paper. I show below the best that I achieved which was not great but I certainly learned about the importance of mesh density!


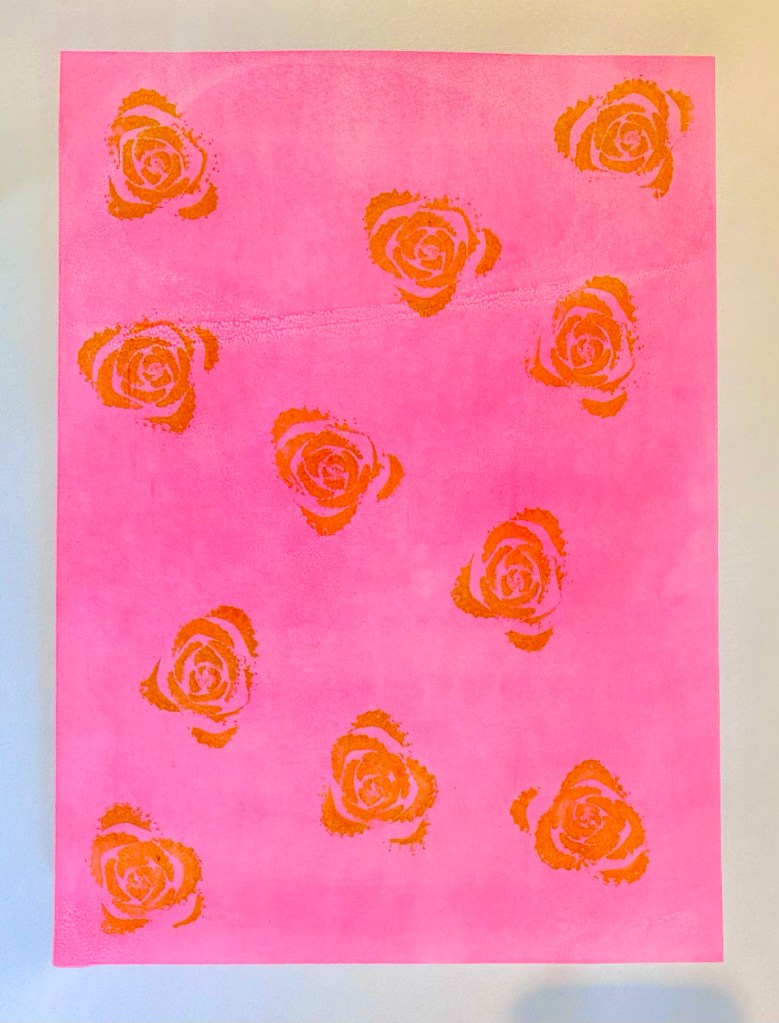
Screenprint with vegetable ink block printing
This was a successful outcome combining two different types of printing: drawing a plain screen of colour using the screen printing method and then printing on top of that using the celery saturated with ink from and ink pad.
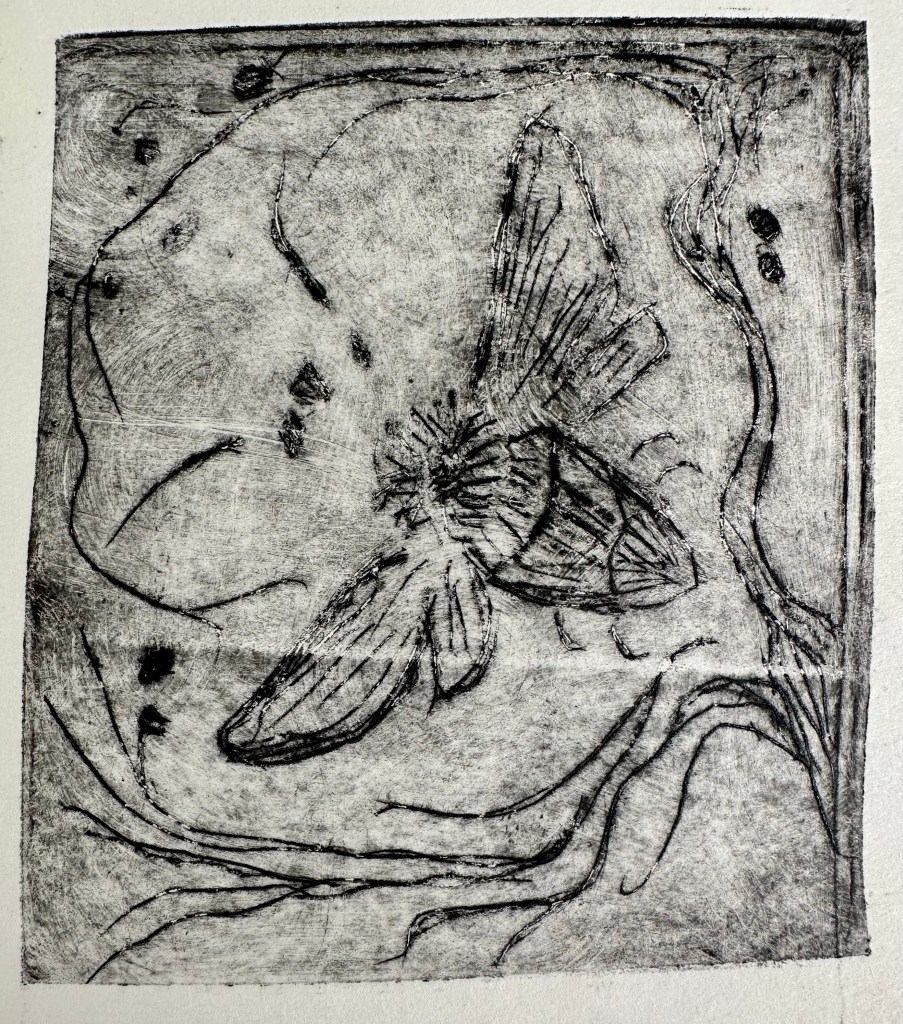
Collograph – Outcome 3
After initially finding it hard to make delicate cuts in the tetrapak, I kept practising and I was happy with the outcome of the bee. I experimented with differnt darknesses of ink and wiping areas away and I feel my final print has depth and an illustrative quality.